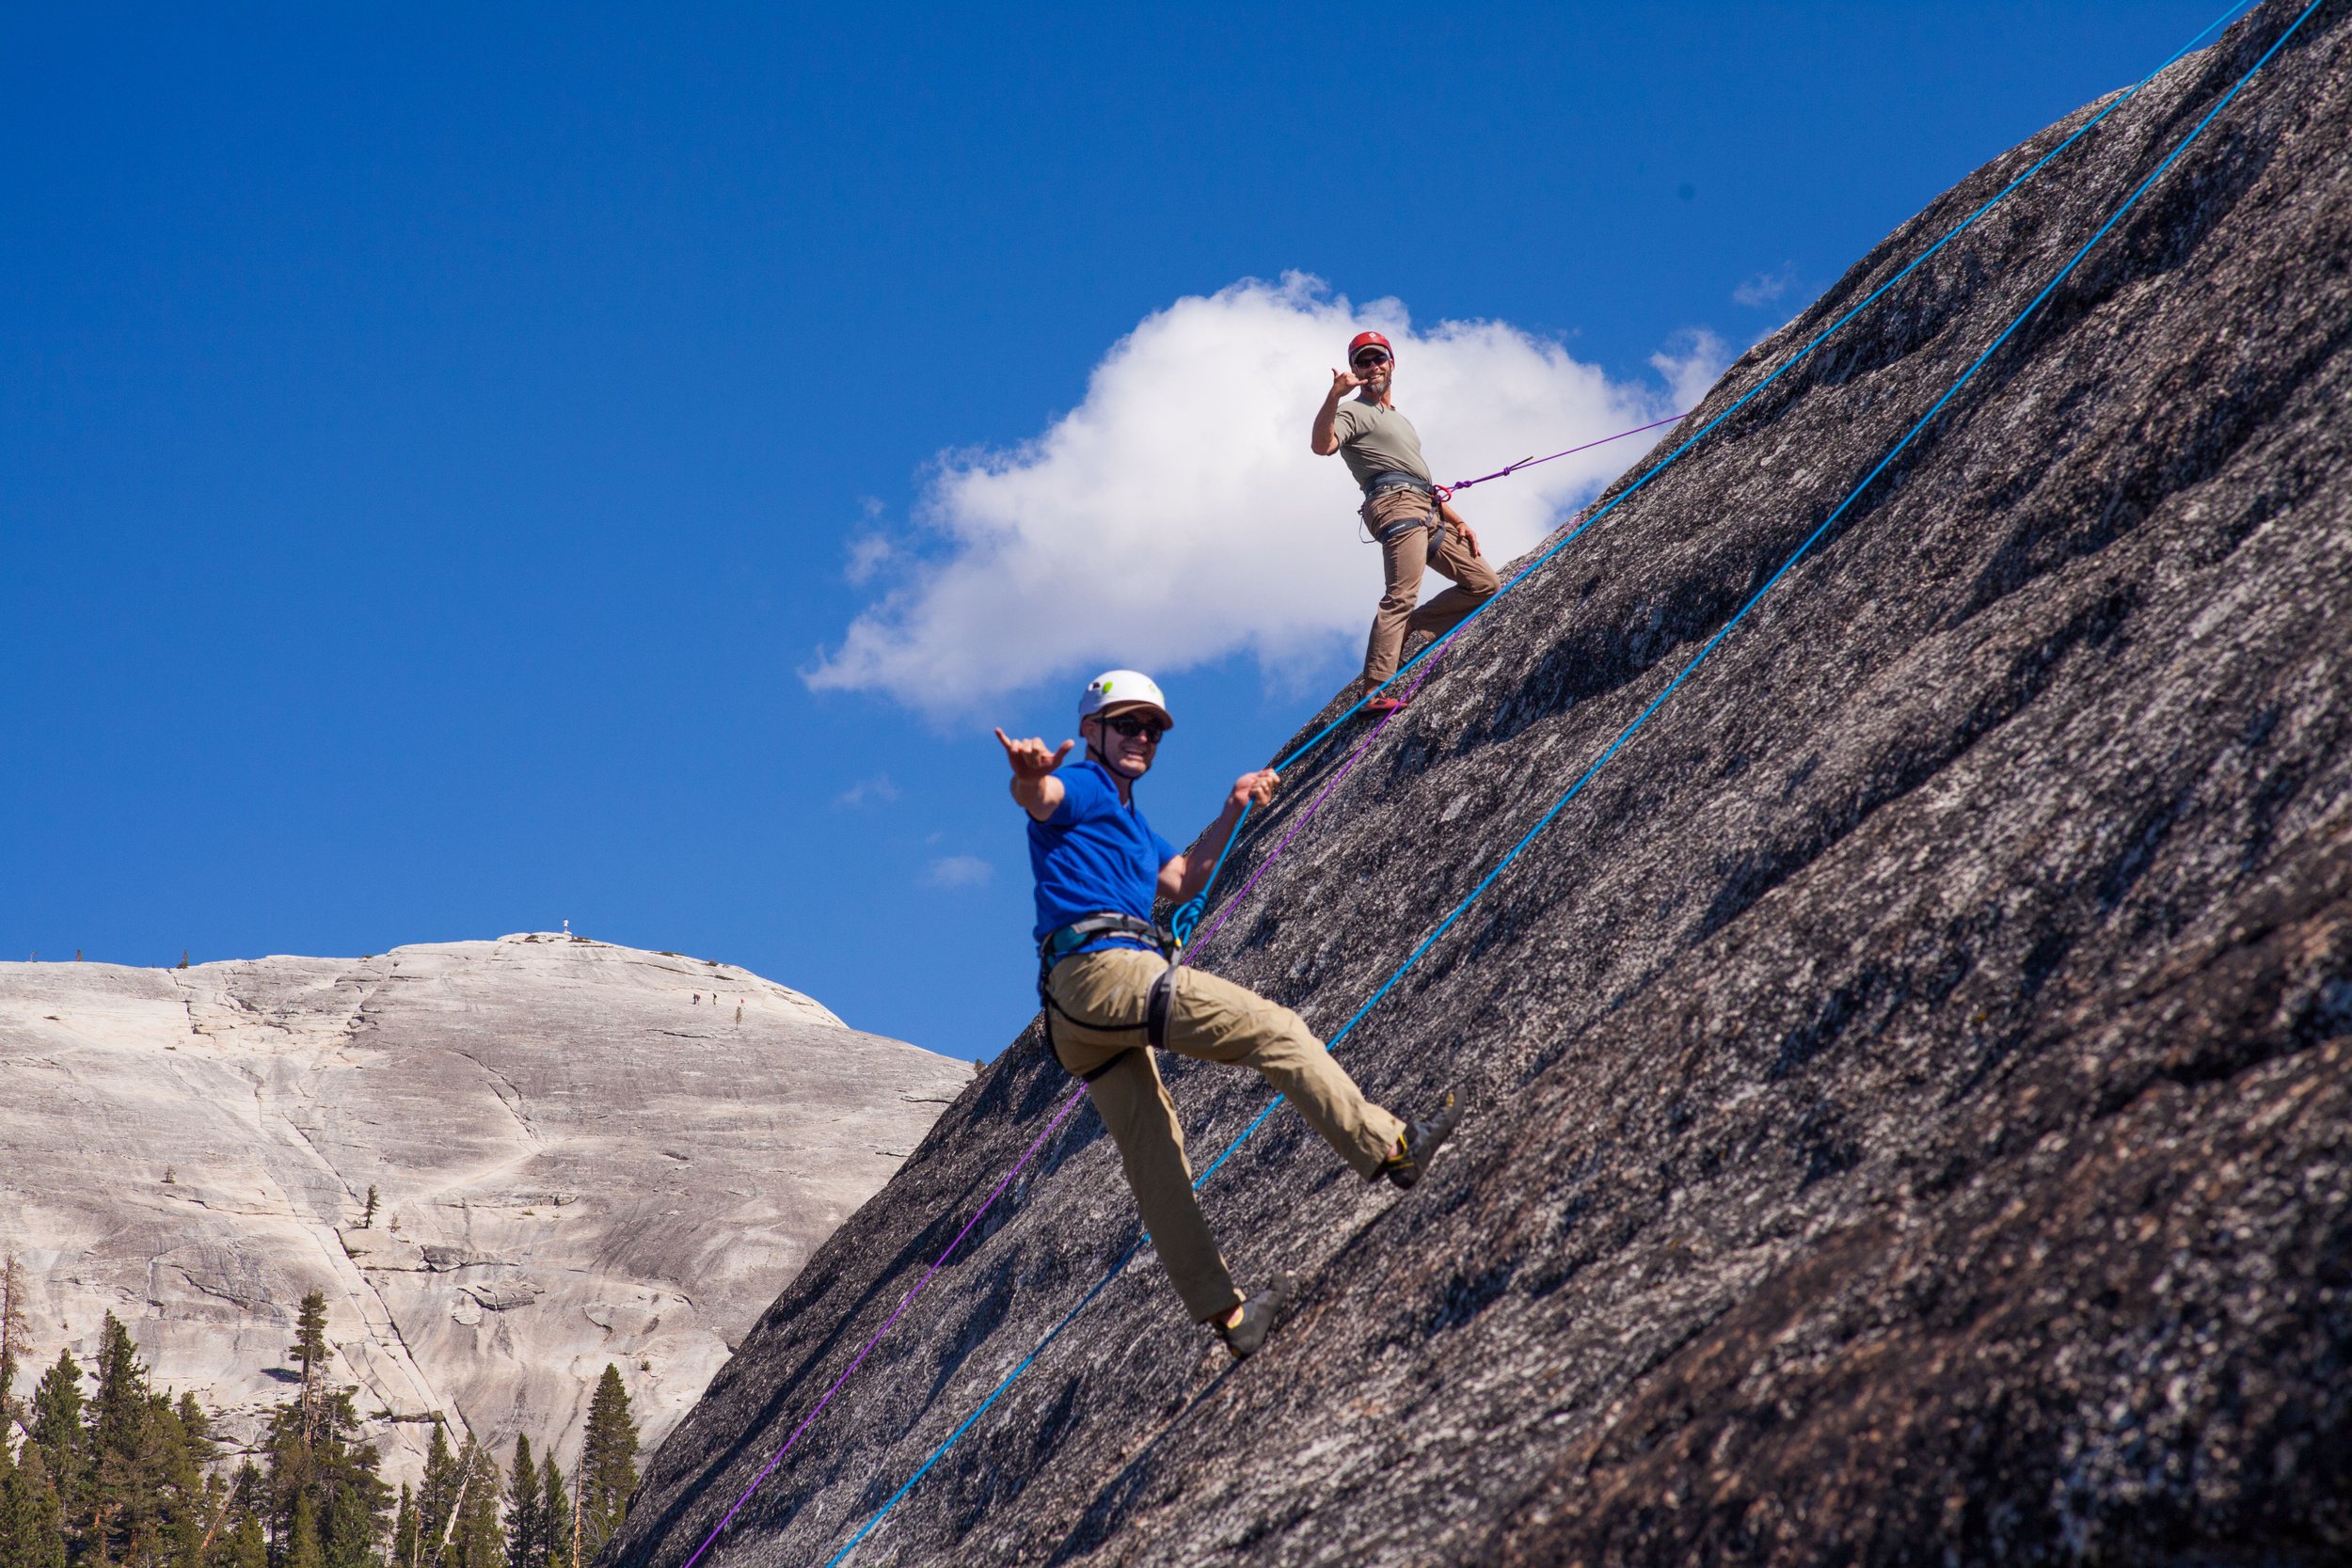
Had a great day with Daniel and Sarah for their very first multi-pitch climbing day! Conditions were perfect at the PSOM slab and they crushed two, three pitch climbs. This was the first official MCG trip. Thanks Daniel and Sarah for a fantastic day!
Use the Shelf
Belay transitions are a great way to save time on longer climbs, the key is to have everything clean, organized, and simple from the start. I hate coming to an anchor and spending unnecessary time re-organizing ropes, dancing with my partner to get out of a tangle, and not having a clear spot to clip into. Take a few seconds to think about how the belay will look and how it should be organized before even putting in your first piece.
There are many great ways to organize and simplify an anchor and belay stance. One such way is to utilize the “shelf” of the anchor. This is the spot just above the knot of the master point you have created. Of course this needs to be a standard equalized cordelett that has loops of cord that you can clip through to isolate the carabiner. Using the shelf is a great way to separate one climber from the next, the belay device (in guide mode), and or multiple climbers clipping to the same anchor. I use this technique all the time while guiding. I clip myself into the shelf, leaving the master point open for the belay device and a clear space for followers to clip into.
Here is how it’s done:
Build a solid, redundant anchor using the standard equalized cordelett method.
Clip a locker to the master point knot and hang your belay device from it (in guide mode).
Clip another locker above the figure eight knot making sure the locker goes THROUGH the three strands of cord coming down from each piece of protection.
Tie into the locker you just clipped to the shelf (the clove hitch is my preferred method).
Yell off belay, pull up all the rope, and get your partner on belay with the pre-rigged belay device hanging from the master point.
(Depending on the belay you can tie in or belay from from the shelf and or the master point as needed.)
Congratulations, you have just set up a well thought out, simple, and organized belay. Your partner will be psyched to be climbing with such a knowledgeable person and you will save time by not having to fix a cluster!
Safety tips:
Make sure your master point knot is dressed and tightened very well.
Double check, that you have trapped your clip in carabineer THROUGH the strands of the cord, and not just clipped around them.
Anchors are not created the same way every time. Make sure your shelf has at least to strands of cord that can be clipped into for redundancy.
If you tie in with a clove hitch make sure it is dressed and cinched down very tight. Hold the non-load strand and actually sit and weight the load strand that you are tied into.
Practice this technique on the ground and make sure you understand the system before making a free attempt on The Nose. Better yet hire me to teach you hands on and we will employ this system while climbing some great routes!
Clove Hitch tie in using “the shelf”.
Climber #1 tied into shelf, climber #2 tied into master point for a clean and organized transition to the next pitch.
Game On!
Friday May, 2nd was the official opening of Tioga Pass! And with that, summer climbing season has begun. Although you can (and do) climb year round here on the East Side the opening of the pass is a ritualistic sign of the coming summer months.
It signifies access to the high country, the valley, and many other great climbing areas. The summers here are short and you have to get after it to check off your tick list for the year. So, GAME ON!
Had a great day with a good friend in one of my favorite places on earth! We climbed two super classics, West Country and South Crack. Although it was a bit windy the conditions were perfect. Trying to focus while thirty feet out from your last piece pasted to sea of granite slab, priceless!
Moving faster by racking smarter
There are many tricks and techniques to moving faster in the mountains. They saying goes “speed is safety”, maybe that’s why Ueli Steck is so fast? Having systems in place to stream line, organize, and add efficiency to your climbing are essential to success on longer more involved climbs. The idea is to spend more time climbing and less time managing all the gear.
One such technique is organizing the way you rack. If you rack your gear close to the same way as possible every time you will spend less time thinking and organizing gear at each belay. On a ten pitch climb x 10 minutes at each belay, you would use up 100 minutes (1 hour 40min)of time just transitioning from one pitch to the next. This could equal the difference of leading the last pitch in the dark or watching the sunset on your bumper with a cold frosty!
There are many ways to rack gear, play around with it and find out what system works for you. This is the point, figure out a streamed lined system and do it the same way every time. Some like gear slings, I like to put most if not all my gear on my harness.
My system is as follows:
(From front to rear)
Right side front gear loop: a set of stoppers on one carabineer, small to large cams.
Right side rear gear loop: 4 to 6 draws clipped in pairs of 2 to save space, a belay device with 2 lockers, and a cordelett.
Left side front gear loop: a second set and or additional stoppers, second set of cams small to large.
Left side rear gear loop: 4 to 6 draws clipped in pairs of 2, cordelett and or other anchor material (double length sling), additional lockers if needed.
Gear loop: disposable carabineer with rescue kit; very small knife, a prussic, and a Tibloc.
I will of course adjust how many draws or pieces of protection I might need given the route. This also leaves room for things like a small water bottle, layer, snack’s in pockets, and approach shoes given the circumstance. If the route is long enough maybe carry a very small (18 liter) pack with water, layer, food, first aid kit, shoes etc.
If you are swinging leads, re-rack on your own harness as you follow and clean. When you get to the belay, grab the rest of the gear and rack it organized to the gear you already have. If you are leading many pitches in a row or the whole climb have the follower clean and rack on a gear sling over the shoulder. When they arrive at the belay take the whole sling and re-rack.
Not only does having a system increase efficiency it allows you to climb better. Knowing where that crucial piece of gear is at the crux will save time and energy! Figure out what works for you and send those long routes you have been dreaming of!
One cordelett many options
From self rescue to building anchors, the cordelett is an indispensable tool. Typically a 7mm piece of 15 to 20 foot cord (from a climbing store) is all you need. Tie it together so you have one big loop and you can construct almost any anchor. Many use a double or even triple fisherman’s to tie the cord together, while this does work it limits some of the utility of the cord. Tying it together with a simple overhand allows you to easily untie it and use the full length of the cord.
Getting the master point in the correct position, especially on multi-pitch climbs makes belaying easier, transitions more efficient, and the belay stance more organized. A good rule of thumb is to have the master point at about chest level. Sometimes we need our cord to be very short and sometimes as long as possible to get it in the correct position.
Here are three very easy, fast, efficient, and safe ways to tie an equalized cordelett at a belay:
Three piece anchor with a simple figure eight to create the master point.
Here is the same anchor but with a shortened cord to raise the master point. (Tie a figure eight but then keep making more wraps until it’s short enough and finish like you would a normal figure eight).
Lastly, an untied cord, in full extension mode with figure eights tied in the end of each strand. Clip the two figure eights to the two outside pieces. The middle of the cord gets clipped to the middle piece, pull down and tie as normal.
A few safety tips:
If you tie your cord together with an overhand, have at least 2 fists of tail (6 to 8 inches). Dress and tighten the overhand really well. Double check the knot and tighten before every use.
To isolate the overhand knot, you can tie a clove hitch near the overhand, usually on the highest piece of gear. This can also make equalization a bit easier.
As always there are many more tricks, uses, and materials for a cordelett. Practice these techniques and add them to your bag of tools for anchor building. Knowing what to do and how to lengthen or shorten your anchor will make your climbing safer and more enjoyable!
Layering For the mountain environment
Successful layering system for the mountain environment
If you like being in the mountains you most likely have a closet full of technical outdoor clothing. Every time I plan a trip one of the first things I think about is what to wear? Lets face it, looking good is feeling good, and feeling good is climbing good! Depending on the conditions I think I might encounter will dictate what I bring. First I gather information such as the weather forecast, the activity I am doing, how high in elevation I will be, and how long I will be out for. No matter the combinations and variations of these factors my layering system is about the same. What it comes down to is your clothing system needs to be: Functional, Reliable, Versatile, Lightweight, and keep you warm enough when the weather gets bad.
The main idea is that this is a LAYERING system. Meaning you want to add and subtract layers as needed to stay comfortable while in the mountains. Each layer should easily be able to add to what you already have on to adjust to your level of activity and the changing weather conditions. For my outer most layers I like to buy them larger. These layers go on last and for winter, my big puffy jacket goes on very last. Likewise if its wet (raining) and cold I need to be able to wear my insulating layer UNDER the shell layer to stay dry and warm.
Through years of trial and error, guiding, and many dollars spent I have refined a system that works for ME and might be a good suggestion for you. Keep in mind everyone is different and might run a little warmer or colder so adjust accordingly.
Starting at our feet for a good foundation:
Socks: High quality wool blend socks. I will adjust the warmth depending on activity, lightweight for summer, warm and medium thick for winter etc. Even if I am out for multiple days I only bring two pair, and swap them out daily.
Footwear: High quality, functional, and well fitting footwear is a must. Its worth it, don’t skimp on this, happy feet equal a happy trip. Again adjusted accordingly, rock, ice, skiing etc. When possible keep to a minimum. If you are doing an “easy” rock route do you really need rock shoes in addition to the shoes you are hiking in? Bring one pair of approach shoes, hike and climb in those. Its a fun challenge and you will be surprised what you can climb in approach shoes.
Underwear: If you don’t go commando, one pair wicking wool or synthetic underwear boxers or briefs.
Long Johns: Nine times out of ten I wear one pair of medium to lightweight long johns. In mid summer start with just the softshell pants and the long johns can be added later. This layer might also be omitted depending on activity ( a one day climb in warm temps).
Pants: I am a fan of soft shell type pants. They must have pockets, Belt loops, and be fairly light. If I am on a multiday trip or anticipate precipitation I will add a very light waterproof layer. This layer must have at least ¾ length or even better full length zippers up both sides of the pants. These can be as simple as a rain layer or as burly as a gore-tex layer.
Shirt: Wicking, wool or synthetic shirt. At times I will wear a short sleeve and a long sleeve over that. Both of these layers are very light. To save weight go with one thin long sleeve shirt, you can roll up the sleeves if need be. I prefer this layer to be light in color and other than black if possible.
Fleece: This might be omitted depending on conditions or activity. My go to, is a mid weight fleece type layer that is breathable and has a hood.
Softshell jacket: A super light soft shell layer that has a hood, blocks the wind, and can shed snow is great piece to have. At times I might leave the fleece behind and only bring this layer to save weight.
Shell Layer: A waterproof, windblocking, simple, with a hood jacket is a must in the mountains. Weather can change drastically and quickly. Having the ability to stay dry and warm can turn a great day out into a full on epic with safety in jeopardy.
Insulation: This layer tends to fluctuate greatly depending on conditions, weather etc. I like to match how cold it is with a light, medium, or heavy Insulating layer. This layer can be synthetic or down but must have a hood.
Gloves: Again match the conditions to the gloves. In winter I always bring at least two pairs of gloves. I light pair for high output activity like hiking and skining, and a warm pair for when it gets cold or you’re just hanging out.
Hats: I always bring head wear. Sun protection, a ball cap or visor and a smooth looking wool or synthetic hat that covers the ears.
Now, lets look at two different types of climbs in different weather conditions and see how the same system can be applied, changed slightly and be a very efficient, light, and versatile way to stay happy in the mountains.
Mt. Whitney, Mountaineers Route in winter:
Socks: 2 Pair Darn Tough Boot Sock Full Cushion
Shoes: la Sportiva Batura Evo
Underwear: Icebreaker 200 weight boxers.
Long Johns: Icebreaker 260 weight.
Soft Shell Pants: Patagonia Alpine Guide Pant (with light webbing belt)
Shell Pants: Patagonia Torrentshell stretch pant (Might add: Patagonia Micro Puff Pants, if very cold)
Shirt: Icebreaker 150 weight long sleeve Tech T Lite
Fleece: Patagonia Piton Hybrid or Patagonia R1 hoody
Softshell: Outdoor Research Ferrosi Hoody
Insulation: Rab Neutrino Endurance down jacket
Hard Shell: Outdoor Research Axiom
Gloves: Outdoor Research Stormtracker Glove and Black Diamond Guide Glove
Hat: Medium weight wool hat and ball cap or visor
Mt. Whitney East Buttress in mid summer:
Socks: 2 pair Darn Tough Light Hiker
Shoes: La Sportiva Ganda Guide
Underwear: Icebreaker 150 weight boxers
Long Johns: Icebreaker 200 weight
Soft Shell pants: Patagonia Alpine guide pant (with light webbing belt)
Shell Pants: Torrentshell Stretch pants or something even lighter
Shirt: Icebreaker 150 weight long sleeve Tech T Lite
Softshell: Outdoor Research Ferrosi Hoody
Insulation: Patagonia Nano or Micro Puff hoody
Hardshell: Outdoor Research Axiom or Patagonia Alpine Houdini
Gloves: Outdoor Research extravert, possibly add Black Diamond Patrol Glove
Hat: Ball cap or Visor and wool cap
With these two examples its easy to see how the same system applies in either circumstance. All you need to do is adjust the amount and warmth factor of clothing to have a system that works all of the time no matter the conditions. Simply put, this system has a wicking layer, softshell layer, insulation, and a hardshell layer. With this system, you will have what you need in any conditions and can easily adjust your layers based on activity and weather conditions.
There are of course many other options, brands, weight savings etc. Play around with what you use or purchase and see what works for you. Personally, I try my best to keep everything as light as possible. At times I might sacrifice a bit of durability for weight savings, although I still keep weight in mind. The saying goes “watch the onces and the pounds take care of themselves”. Have fun with your technical wardrobe, look good, and enjoy the mountains!
Simple, Safe, Rappel Anchor
Have you ever rappelled off a climb and had a cluster of a mess at each rap station? Have you ever been wrapped up in your partners tether or so close to them that it made it hard to manage the next rappel? With a few quick and simple techniques you can make your rappels safer, more efficient, and maybe even fun!
Let’s assume you are going to descend a multiple rappel rap route that has two bolts at each station. Before you even get to the first station set this system up:
Step 1. Take a cordelette and double it (so you have two big circles). Grab the middle point of those circles so you now have four strands of cord in your hand. The cord should form a big upside down U shape with one hand grasping the middle of the cord.
Step 2. Tie an overhand or figure eight knot on both sides of your hand holding the middle of the cord. You should have about ten inches of space from one knot to the other.
Step 3. The middle of the cord is the “master point” or the spot that you will clip into. The two free ends will receive a carabineer that goes through two strands of cord and gets clipped into the bolts of the anchor.
Step 4. You can clip yourself into two strands of the master point and your partner can clip into the other two strands.
Congratulations! You have just set up a self equalizing, safe, efficient, organized rappel anchor that you can use at any rap station.
This system is known as the “quad” anchor, and is mostly used for a super strong top rope set up but works equally as well for rappelling. Here is why:
It is self equalizing, even if the bolts are at different lengths at each station, as you clip in with this it will automatically equalize and be ready to go.
You and your partner have two strands of cord to clip into or a left and right, keeping everything clean and organized.
Additional Tips: Have each person set this up so on the way down you leap frog the cords and the system is the same at each station.
As you rig the whole system keep the knot that holds your cord together out of the way or at one end of the free strands that gets clipped to the bolts.
Instead of using the quad described above you can use a sliding X type of anchor made of slings or similar.
As with any new technique practice on the ground and make sure you understand the system before you go sport rappelling off the Nose of El Cap!
Basic “Quad” with overhand knots.
Quad with figure 8’s to make it shorter with Mr. Green and Mr. Blue clipped into the two strands on the left and right.
Tether System For Rappeling
Climbers have heard that the most dangerous part of the climb is the decent or “most accidents happen on the way down”. Rappelling is unnerving for most climbers and it is the part of our climbing day when we rely one hundred percent on our gear. There are many ways to set up a tether system for rappelling. Let’s look at a safe, efficient, and practical way to set up an easy rappel rig that does not require any special gadgets other than what you would already have with you.
Step 1. Girth hitch a double length sling to your harness going through your leg and waist belt tie in points (the very same places you would tie your rope into).
Step 2. Grab the free end of the sling and clip a locker into the loop. With your other hand pinch roughly the middle if the sling and clip that locker back to your harness belay loop.
Step 3. You should now be holding the middle of the sling with one end girth hitched to your harness and the other end clipped to your belay loop. At that middle point you are holding tie a simple overhand knot on a bite using both strands of the sling. You will end up with an overhand knot in the middle of the sling that has two loops. Clip your belay device and locking carabineer through that loop (clip through both strands).
Step 4. Rig up a rappel as you normally would. Rappel of the belay device that is clipped to the over hand knot on the sling. Use the end of the sling with the locker attached (clipped to your belay loop) has your tether to clip to multiple rappel stations on the way down.
You know have a very easy and safe rappel rig to descend with and clip into anchors on the way down.
This system offers several advantages:
You have extended your rappel device offering you more control.
You can easily set up a third hand backup (prussic or similar type friction hitch) without it getting sucked up into the belay device.
You have a tether to clip into other rappel and belay stations.
You have a redundant system when the end of the sling is clipped back into your belay loop.
Not only is this system easy to set up, it makes for a super clean and organized way to descend with multiple people, keeping the rappel stations clean and organized making for a faster and safer descent.
A few notes on safety: Keep tension on your tether as you are clipped into the anchor. Do not climb above the anchor as this can result in a short static fall with very high loads and could potentially break the sling you are attached to. If you need to be closer to the anchor for some reason, you can always clip a second locker to the overhand knot that your belay device is clipped to and use that has another shorter clip in point. Practice this technique on the ground first and make sure you understand the system before you start bailing from El Cap Spire. Always double check your system and have your partner look at it as well, have fun and be safe!
3D Link Up
For skiing, this has been a very dry and slow year. Just when we thought spring was in full swing we received a great series of storms here on the east side. No complaints here! When the snow falls you have to take full advantage.
A friend and I on a day off went for the 3D (triple D) link up. The full monty would be to ski the 3D chute on Dream Mountain in June Lake, climb back up and ski the Fern Grotto (AKA Fern Chute) Climb back up yet again and ski Carson Peak back to the car. This is a great and logical link up of 3 classic and spectacular ski descents. Not having passes we had to hike up from the bottom and after some serious skiing down 2 chutes our legs were trashed so we bailed on Carson peak. Lets call it the Double D link up instead.
Getting ready and looking onto 3D Chute
A Short rappel drops you into a 50 deggree chute.
Hop turns and decent snow were the name of the game
Recent Comments